
To release a record or publication on the Open Government Portal, you will need an Open Government Registry account.
On this page
Creating records
In this section
Create a record
The steps to upload your data or information record can be found here. Depending on what type of record being uploaded, you will enter the upload process differently. Notice there are two entry points to begin uploading based on the type of record you wish to upload.
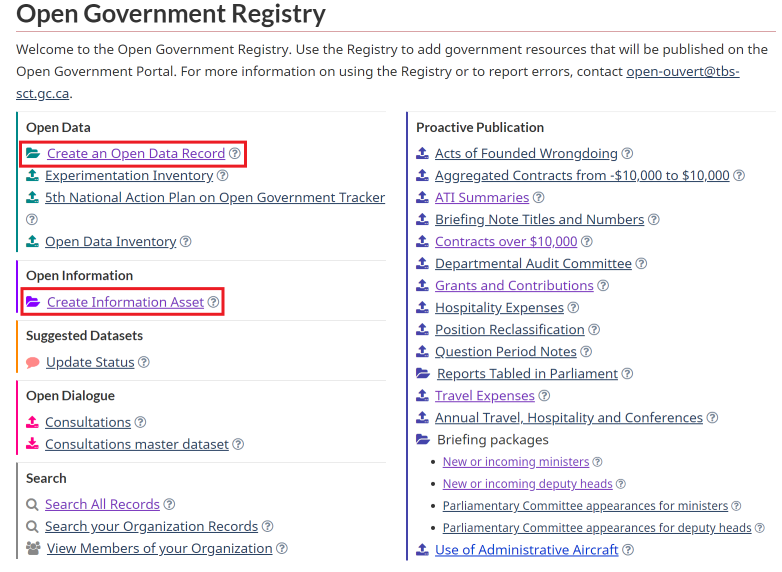
Add Asset Metadata
On the Open Data or Open Information pages, enter the metadata for your record.
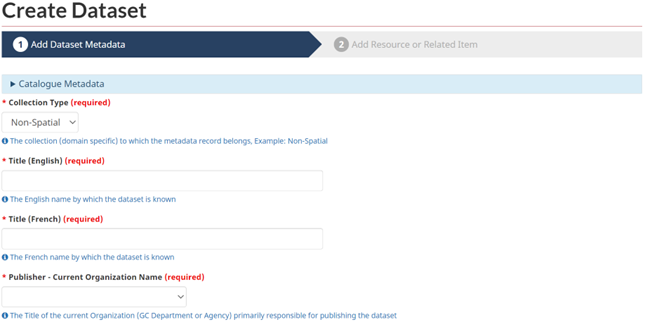
The Create Dataset: Add Asset Metadata page includes fields for each element of metadata. Under each field is a description of the field in blue font. Not all fields are mandatory, but you should fill out as much information as possible. The more information you assign to your record, the more discoverable the record will be for users.
Note: The collection type will be different depending on which entry point you first come through to create your record.
You must select Yes in the Approval drop-down menu to release your open data or information record. By selecting Yes, you confirm that the necessary approvals have been obtained and that your organization takes full responsibility for the release of the data or information.
Has approval been obtained? By selecting yes, you have ensured that the following statements are true:
- Confidentiality - The data or information resource is not subject to confidentiality restrictions, such as Cabinet confidences, solicitor-client privilege, classified or protected information, advice or recommendations, third party information, or information obtained in confidence.
- Authority to Release - The institution has the mandate, legislative authority or permission from a third party provider to release the data or information resources under the Open Government Licence – Canada.
- Formats - The data or information resource is in an open and accessible format that complies with the Standard on Web Accessibility.
- Privacy - The data or information resource does not contain personal information, as defined in section 3 of the Privacy Act, unless the individual to whom it relates has consented to its release or unless it meets criteria outlined in section 8(2) of the Privacy Act.
- Official Languages - The data or information resource is available in both official languages and conforms to the requirements of the Official Languages Act.
- Security - The data or information resource does not increase security risks to the institution, to other institutions, or to the government as a whole and conforms to the requirements of the Policy on Government Security and its related instruments.
- Other - Legal / Regulatory / Policy / Contractual - The release of data or other information resource complies with all other relevant legal, regulatory, contractual, and policy requirements (e.g., it is confirmed that there are no relevant legal, contractual, or third party, policy restrictions or limitations).
Contact your Open Government Coordinator for more information on your organization’s approval process for open data and information.
Add a resource to your record
When you are finished entering the metadata for the record, select Next: Add Resource or Related Item. You can add resources to your open data or information record and describe each resource on the Create Dataset: Add Resource Metadata page. A resource is an individual file or a link.
You can add as many resources as you need to your record.
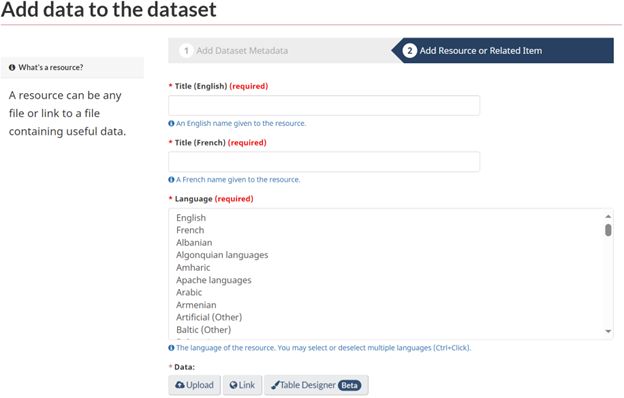
To upload a resource to your open data or information record, follow these steps.
- Enter the title of the resource in English and French, the language of the resource, and the URL where the resource can be downloaded.
- Expand the Metadata Fields for Resources Only (Not for Related Items) section, which is shown in blue font, and complete the relevant fields. Do not enter any information in Metadata Fields for Related Items Only.
- Select Submit to finish adding the resource. Select Save & add another if you wish to submit the resource and add another resource or related item.
Note: All resources added to the Open Government Registry must be available in both official languages. To upload a bilingual file, select the Shift key to select both English and French. If a resource exists separately in English and in French, then both the English and the French versions of the resource must be added by following the instructions above.
If uploading CSV
When comma-separated values (CSV) data is uploaded into the Open Government Registry, the system will perform a basic validation of the structure to ensure that the CSV data is valid.
You will not be prevented from releasing invalid CSV data onto the Open Government portal. However, to take advantage of features that use the CKAN DataStore, such as the Table View or the Data API (application programming interface), the uploaded CSV data must be valid.
Data unknown
If the CSV dataset being reviewed contains any errors, follow these steps to help the user resolve the errors.
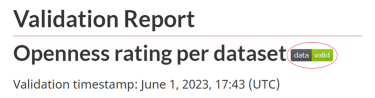
When a CSV dataset is first uploaded, the validation badge will appear as data unknown. Once the CSV dataset has been validated, the badge will appear as data valid or data invalid.
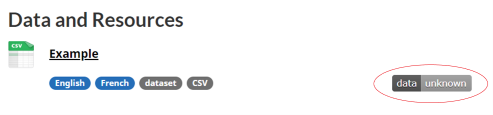
Data valid
When a CSV dataset that is uploaded contains no structural errors, the data valid badge will appear next to the dataset.

If you select the badge, you will be taken to the Validation report page. If a CSV dataset is valid, the report will contain only the time-stamp of when the dataset was last validated.
Data invalid
If an uploaded CSV dataset contains structural errors, the data invalid badge will appear next to the dataset.

If you select the badge, you will be taken to the Validation Report page. The report will contain:
- the time-stamp of when the dataset was last validated
- detailed information about the structural errors in the CSV dataset
The information about the errors should be clear to a novice data publisher. For each type of error detected in the CSV dataset, the validation report will set out:
- how many instances of that error were detected by the system
- a plain language description of what the error is and how to fix it
- where each error is in the dataset
The system will also show a preview of the dataset where the error was found, and shade the cells that contain an error in red.
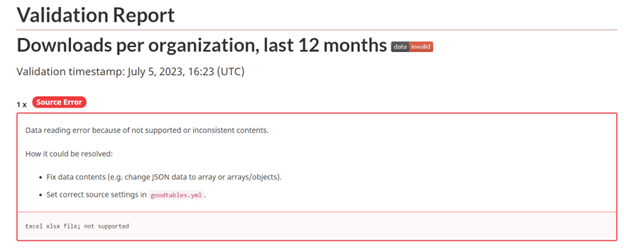
If an error applies to an entire row in the CSV dataset, then the system will list the row or rows that contain the error. If an error applies to a specific cell or cells, the system will indicate which row or rows and which column or columns contain the error.
The validation conducted by the system does not check for every possible error in a CSV dataset. However, most of the common structural errors are checked, including:
- blank-header: there is a blank header; all cells in the header row must have a value
- duplicate-header: there are multiple columns with the same name; all columns must have unique names
- blank-row: rows must have at least one non-blank cell
- duplicate-row: rows cannot be duplicated
- extra-value: a row has more columns than the header
- missing-value: a row has fewer columns than the header
If uploading PDF
You are responsible for verifying that a PDF document is compliant with accessibility requirements before you submit the document for release onto the Open Government portal. If a non-compliant PDF document is submitted for release, it will be sent back to you for correction.
You can use Adobe Acrobat Pro and Foxit PhantomPDF to check the accessibility of PDF documents.
To check the accessibility of a PDF document in Foxit PhantomPDF, follow these steps:
- In Foxit PhantomPDF, select File and select Open in the drop-down menu.
- Under Open, find the PDF document that you want to check.
Figure 9. File tab and drop-down menu in Foxit PhantomPDF 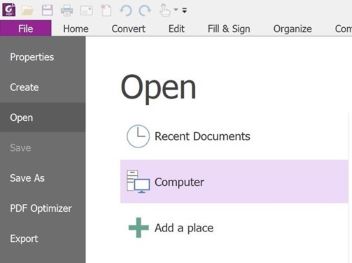
- In the Accessibility tab, select Full Check.
Figure 10. Full Accessibility Check 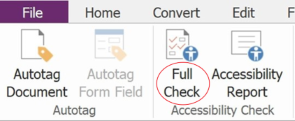
- The Accessibility Checker Options pop-up will open. In the pop-up, select Start Checking to generate a list under Accessibility Check. This list flags any accessibility issues in the PDF document.
Common accessibility issues in PDF documents and how to correct them
The most common accessibility issues with PDF documents involve the Title and Bookmarks.
In the list under Accessibility Check, any issues flagged can be resolved by:
- right-clicking the failed entry or selecting Shift + F10 keys on the keyboard
- selecting Fix in the drop-down menu
Figure 11. Accessibility Check panel 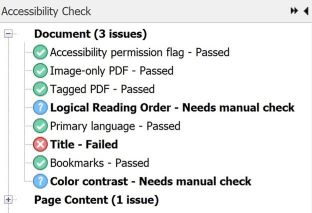
Figure 12. Accessibility Check panel with errors listed 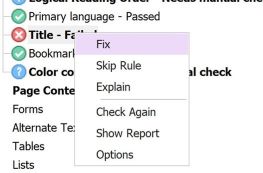
- entering corrections in the Description pop-up that appears after you select Fix
For example, if there is a failed title, enter the title of the document in the Title field. Doing so will ensure that a screen reader reads the correct title, rather than the file name.
Figure 13. Description pop-up 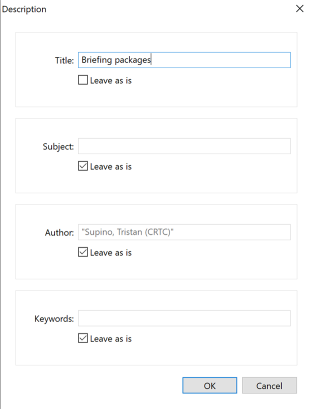
Managing records
In this section
Adding a data dictionary
Since your record may include resources, such as supplementary documentation, other information about how the data was collected or a related publication, you are encouraged to add a data dictionary to provide information about those resources.
This data dictionary should identify the type of data elements that the user should expect to see in the tables, rows and columns, including the name, description and characteristics of each data element. Common metadata elements that would appear in a data dictionary include:
- the table name
- the field names from each table
- the type of data for each field
- a brief description of the type of data expected in the field
- definitions of any codes used in the data or header fields, such as:
- a list of possible values
- a list of possible ranges
- external definitions (other source datasets, international standards)
- similar external uses of the fields (datasets that use the same header value definition)
The data dictionary should be made available in an easy-to-access format (for example, a text (.txt) file). Data creators or publishers are not expected to manipulate the headers of their data tables, but we do encourage them to create a data dictionary as a supporting document. Doing so ensures that the inherent meaning of the headers remains intact and provides the end user with a reference document to better describe, interpret and use the data.
Adding a related item
You can add links to records that are related to the record that you are registering. The following are a few examples of links that you might want to add:
- a link to the open government record that supersedes your dataset
- a link to the open government record used in your open information publication
- a link to application gallery records for applications that use your dataset
Follow these steps to add a related item:
- Take note of the URL of the record that you wish to link to.
- Go to the Create Dataset: Add Resource Metadata page
- Enter the title of the related item in English and French, the language of the related item, and its URL. Do not enter any information in Metadata Fields for Resources Only (Not for Related Items).
Expand Metadata Fields for Related Items Only and choose the Related Record Type from the drop-down menu. You can also choose a Relationship Type (for example, continues, supersedes, merged with).
Figure 14. Metadata Fields for Related Items Only 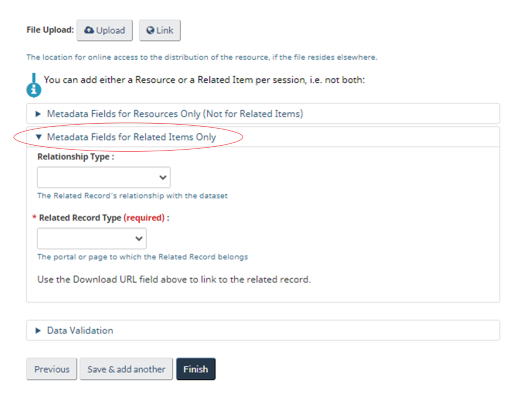
- Select Finish to save your related item or select Save & add another to add another item.
Editing an open data or information record
You may need to edit an open data or information record to update the metadata, provide new URLs or add new resources or related items.
Edit an open data or information record
- On your record page, select the Manage button to edit the metadata.
Figure 15. Manage button 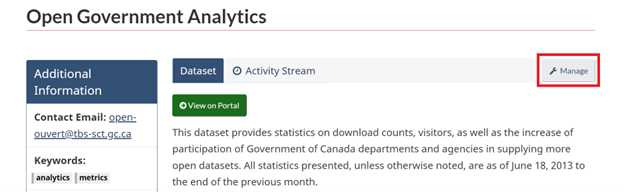
- When you are finished updating the metadata fields, select the Update Record button to save your changes.
Add a resource to an open data or information record
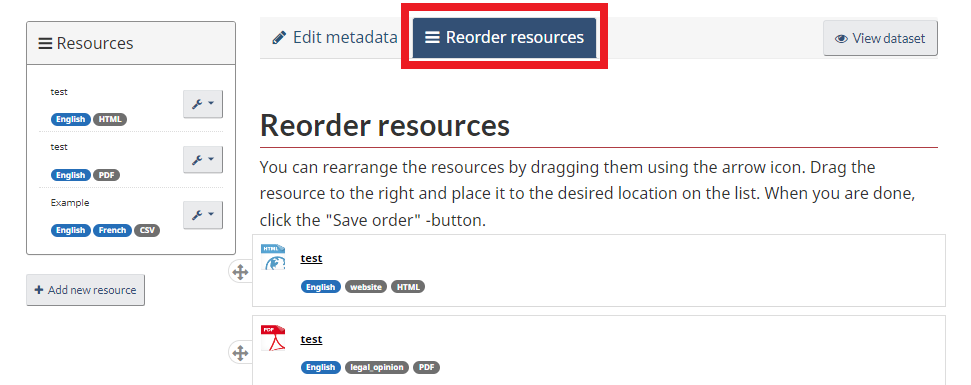
- On your record page, select the Manage button, then select Resources.
- Select + Add new resource located on the left-hand side of the page to add the resource.
- Once you have finished entering the metadata for the resource, select Add to save your new resource.
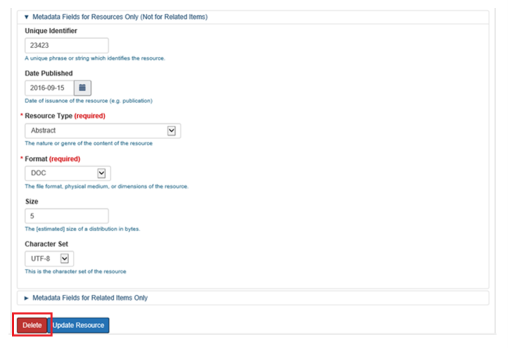
Edit a resource

- On your record page, select the Edit button beside the resource you wish to edit.
- When you are finished editing, select the Update Resource button to save your changes.
Deleting an open data or information record
- On your record page, select the Manage button.
Figure 18. Manage button - Scroll to the bottom of the page and select the Delete button.
Figure 19. Delete record 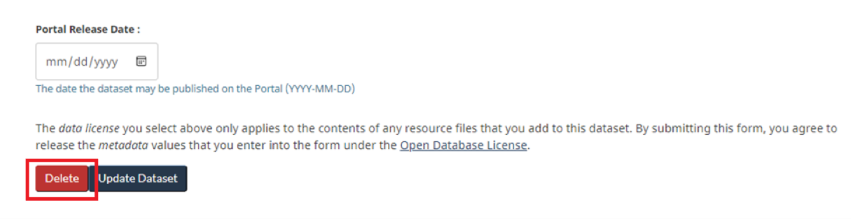
Deleting a resource
- On your record page, select the Edit button beside the resource you wish to delete.
- Select the Delete button to delete your resource.
Releasing a record to the Open Government portal
If the record is ready to be released on the Open Government portal, select Yes from the Ready to Publish drop-down menu on the Create Dataset: Add Asset Metadata page. Doing so will flag the record so that it will be reviewed by an Open Government Registry Administrator. If your record is not ready to be released, select No.

Note: Only Open Government Registry Administrators can release new open data or open information records to the Open Government portal.
Once the user has submitted the record for release and all approvals have been received, an Open Government Registry Administrator will release the record onto the Open Government portal. If the release is urgent, send an email to open-ouvert@tbs-sct.gc.ca to request action.